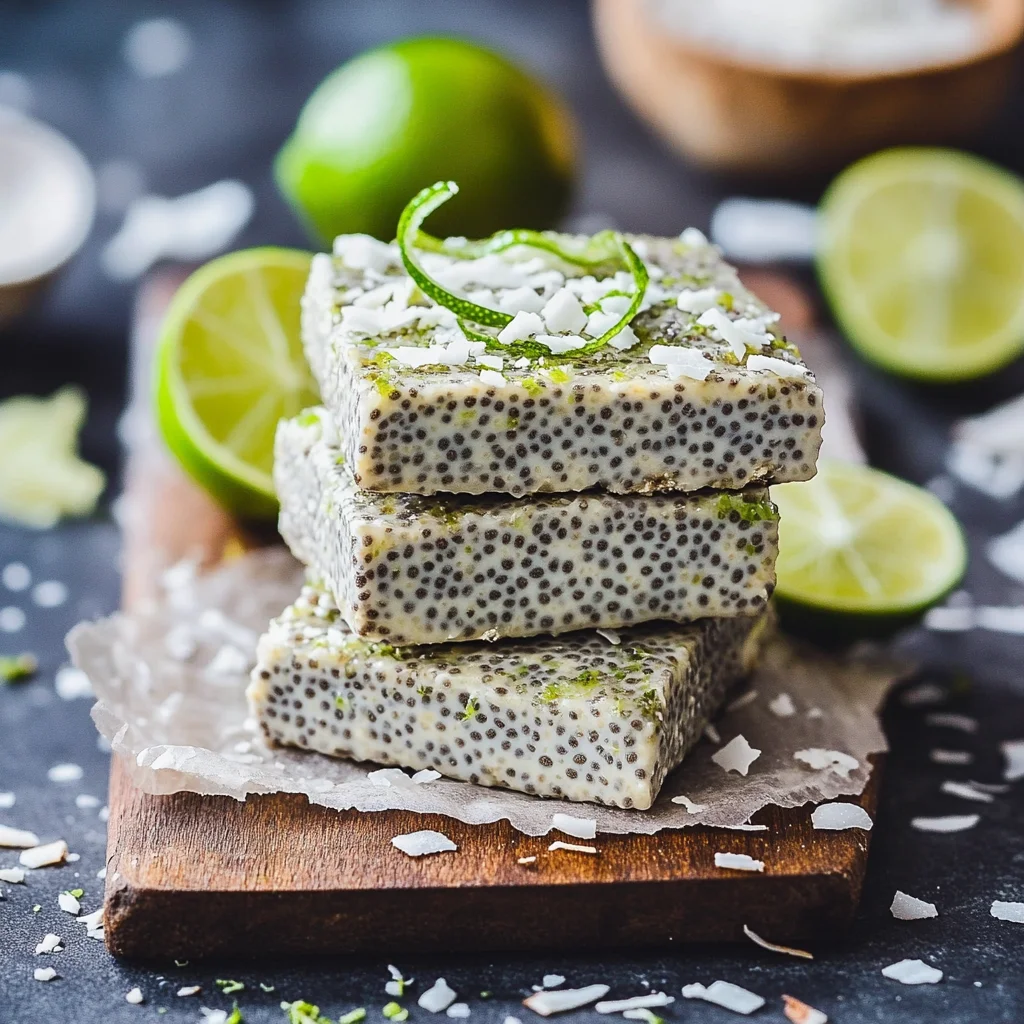
Introduction to Refreshing No-Bake Chia Pudding Bars with Zesty Coconut Lime Flavor
As a busy mom, I know how challenging it can be to whip up something delicious and healthy in a pinch. That’s why I’m excited to share my recipe for Refreshing No-Bake Chia Pudding Bars with Zesty Coconut Lime Flavor. These bars are not only a breeze to make, but they also pack a punch of flavor that will impress your loved ones. Whether you need a quick snack for the kids or a light dessert after dinner, these bars are the perfect solution. Trust me, you’ll want to keep this recipe close at hand!
Why You’ll Love This Refreshing No-Bake Chia Pudding Bars with Zesty Coconut Lime Flavor
These Refreshing No-Bake Chia Pudding Bars are a game-changer for busy days. They come together in just 15 minutes, making them a quick and easy treat. The zesty coconut lime flavor is like a tropical vacation in every bite! Plus, they’re healthy, vegan, and can be made ahead of time. You’ll love how they satisfy your sweet tooth without the guilt. Perfect for any occasion!
Ingredients for Refreshing No-Bake Chia Pudding Bars with Zesty Coconut Lime Flavor
Gathering the right ingredients is the first step to creating these delightful bars. Here’s what you’ll need:
- Full-fat coconut milk: This creamy base gives the bars a rich texture and a tropical flavor.
- Chia seeds: These tiny powerhouses are packed with fiber and omega-3 fatty acids, helping to thicken the pudding.
- Maple syrup or agave nectar: A natural sweetener that adds just the right amount of sweetness without overpowering the other flavors.
- Lime zest: This brightens the dish, adding a refreshing zing that pairs beautifully with coconut.
- Lime juice: Freshly squeezed juice enhances the tangy flavor, making each bite a burst of citrus.
- Vanilla extract: A splash of vanilla rounds out the flavors, adding warmth and depth.
- Pinch of salt: Just a touch helps to balance the sweetness and enhance the overall flavor.
- Optional crust ingredients:
- Almonds or cashews: These nuts create a crunchy base, adding texture and healthy fats.
- Shredded unsweetened coconut: This adds a delightful chewiness and enhances the coconut flavor.
- Medjool dates: Naturally sweet, they help bind the crust together while adding a caramel-like flavor.
- Melted coconut oil: This helps to hold the crust together and adds richness.
- Toppings:
- Toasted coconut flakes: These add a crunchy, nutty finish that’s simply irresistible.
- Extra lime zest: A sprinkle on top brightens the presentation and flavor.
For exact measurements, check the bottom of the article where you can find everything listed for easy printing. Enjoy the process of gathering these ingredients; it’s the first step toward a delicious treat!
How to Make Refreshing No-Bake Chia Pudding Bars with Zesty Coconut Lime Flavor
Step 1: Prepare the Optional Crust
To start, let’s make the optional crust. In a food processor, combine your choice of almonds or cashews, shredded coconut, pitted Medjool dates, melted coconut oil, and a pinch of salt. Pulse until the mixture clumps together, resembling wet sand. This crust adds a delightful crunch and flavor to your bars. Once ready, press it firmly into the bottom of an 8×8 inch pan lined with parchment paper. Chill it in the fridge while you prepare the filling.
Step 2: Prepare the Chia Pudding Filling
Now, let’s whip up the chia pudding filling! In a medium bowl, whisk together the full-fat coconut milk, chia seeds, maple syrup or agave nectar, lime zest, lime juice, vanilla extract, and a pinch of salt. Whisking well is crucial here; it prevents clumps and ensures the chia seeds are evenly distributed. This mixture will transform into a creamy, luscious pudding that’s bursting with zesty coconut lime flavor. Trust me, it’s worth the effort!
Step 3: Let the Mixture Sit
After mixing, let the chia pudding sit for about 5-10 minutes. This resting period allows the chia seeds to absorb the liquid and swell, thickening the mixture. After the time is up, whisk it again to break up any clumps that may have formed. This step is essential for achieving that perfect pudding texture that will hold together beautifully in your bars.
Step 4: Pour and Spread
Next, it’s time to pour the chia pudding mixture over your chilled crust. If you’re skipping the crust, simply pour it directly into the parchment-lined pan. Use a spatula to spread the mixture evenly, ensuring every corner is filled. This step is where the magic happens, as the layers come together to create a delicious treat that’s both healthy and satisfying.
Step 5: Refrigerate
Cover the pan with plastic wrap or a lid and refrigerate for at least 4 hours, or preferably overnight. This chilling time is crucial for the chia pudding to set properly. The longer it sits, the firmer and more delicious it becomes. You’ll want to resist the temptation to dig in too soon, as patience will reward you with the best texture!
Step 6: Add Toppings
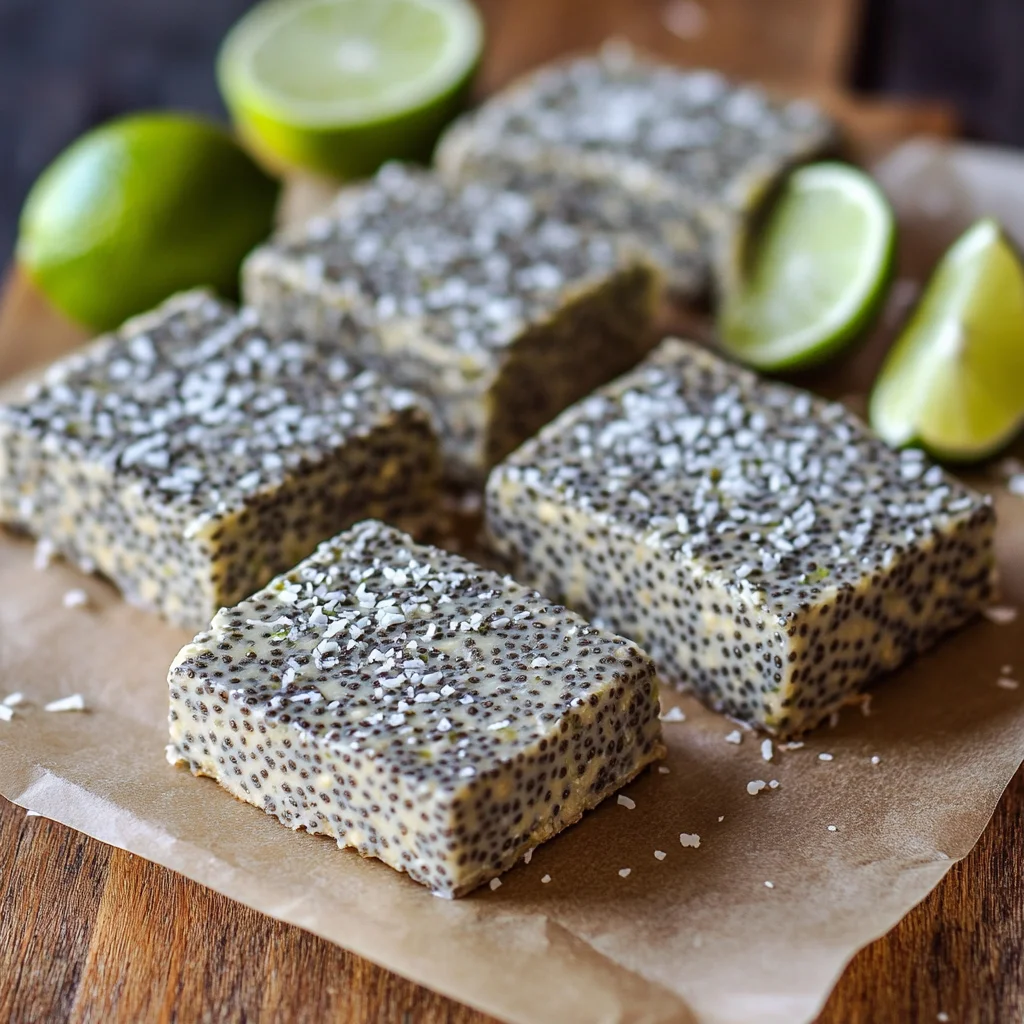
Once your chia pudding bars are firm, it’s time to add the finishing touches. Lift the slab out of the pan using the parchment paper overhang. Generously sprinkle toasted coconut flakes and extra lime zest on top. These toppings not only enhance the flavor but also add a beautiful presentation that will impress anyone you serve them to. It’s like a little tropical paradise on a plate!
Step 7: Cut and Serve
Finally, it’s time to cut and serve your delicious bars! Use a sharp knife to slice them into squares or bars, depending on your preference. For easy storage, keep any leftovers covered in the refrigerator for up to 4-5 days. These bars make for a perfect snack or dessert, ready to brighten your day whenever you need a refreshing treat!
Tips for Success
- Make sure to whisk the chia pudding mixture thoroughly to avoid clumps.
- For a sweeter taste, adjust the maple syrup or agave nectar to your liking.
- Chill the bars overnight for the best texture and flavor.
- Experiment with different nuts or seeds in the crust for variety.
- Use fresh lime juice for the brightest flavor.
Equipment Needed
- Food processor: Essential for making the crust; a blender can work in a pinch.
- Mixing bowl: Any medium-sized bowl will do for whisking the filling.
- Spatula: Perfect for spreading the mixture evenly.
- 8×8 inch pan: A square baking dish is ideal; you can use any similar-sized dish.
- Parchment paper: Helps with easy removal; aluminum foil can be a substitute.
Variations
- Chocolate Chia Pudding Bars: Add cocoa powder to the filling for a rich chocolate twist.
- Berry Bliss: Fold in fresh or frozen berries like blueberries or raspberries for a fruity flavor.
- Nut-Free Option: Omit the nuts in the crust and use seeds like sunflower or pumpkin seeds instead.
- Sweetener Swap: Use honey or agave nectar instead of maple syrup for a different sweetness profile.
- Spiced Up: Add a pinch of cinnamon or ginger to the filling for a warm, spiced flavor.
Serving Suggestions
- Pair these bars with a refreshing glass of iced herbal tea for a delightful afternoon snack.
- Serve alongside fresh fruit like mango or pineapple to enhance the tropical vibe.
- For a fun presentation, cut the bars into fun shapes using cookie cutters.
- Top with a dollop of coconut whipped cream for an indulgent treat.
FAQs about Refreshing No-Bake Chia Pudding Bars with Zesty Coconut Lime Flavor
Can I make these bars ahead of time?
Absolutely! These Refreshing No-Bake Chia Pudding Bars can be made a day or two in advance. Just store them in the refrigerator, and they’ll be ready to enjoy whenever you need a quick snack or dessert.
How long do the bars last in the fridge?
When stored properly, these bars can last up to 4-5 days in the refrigerator. Just make sure to keep them covered to maintain freshness!
Can I substitute the coconut milk?
Yes! If you’re not a fan of coconut milk, you can use almond milk or any other plant-based milk. Just keep in mind that the texture and flavor will change slightly.
Are these bars gluten-free?
Yes! These Refreshing No-Bake Chia Pudding Bars are naturally gluten-free, making them a great option for those with gluten sensitivities.
What can I use instead of maple syrup?
If you prefer a different sweetener, agave nectar or honey (if not vegan) can be used as substitutes. Just adjust the amount to suit your taste!
Final Thoughts
Creating these Refreshing No-Bake Chia Pudding Bars with Zesty Coconut Lime Flavor has been a delightful journey for me. Each bite is a reminder of sunny days and tropical escapes, making them a perfect treat for any occasion. I love how easy they are to prepare, allowing me to spend more time with my family instead of in the kitchen. Plus, knowing they’re healthy and satisfying makes them even more enjoyable. I hope you find as much joy in making and sharing these bars as I do. They truly are a little slice of paradise!
Print
Refreshing No-Bake Chia Pudding Bars with Zesty Coconut Lime Flavor for a Tangy Treat!
- Total Time: 4 hours 15 minutes
- Yield: 16 bars 1x
- Diet: Vegan
Description
A refreshing and tangy treat, these no-bake chia pudding bars are infused with zesty coconut and lime flavors, perfect for a healthy dessert or snack.
Ingredients
- 1 can (13.5 oz / 400ml) full-fat coconut milk
- 1/2 cup / 80g chia seeds
- 1/4 cup / 60ml maple syrup or agave nectar
- Zest of 1 large lime
- Juice of 1/2 large lime (about 2 tbsp / 30ml)
- 1 teaspoon / 5ml vanilla extract
- Pinch of salt
- 1 cup / 140g almonds or cashews (optional crust)
- 1/2 cup / 45g shredded unsweetened coconut (optional crust)
- 1/4 cup / 45g Medjool dates, pitted (optional crust)
- 1 tablespoon / 15ml melted coconut oil (optional crust)
- Pinch of salt (optional crust)
- Toasted coconut flakes (topping)
- Extra lime zest (topping)
Instructions
- Prepare the optional crust: Add almonds/cashews, shredded coconut, pitted dates, melted coconut oil, and salt to a food processor. Process until the mixture clumps together and sticks when pressed. Press this mixture firmly into the bottom of an 8×8 inch (20×20 cm) pan lined with parchment paper. Chill while preparing the filling.
- Prepare the chia pudding filling: In a medium bowl, whisk together the full-fat coconut milk, chia seeds, maple syrup/agave, lime zest, lime juice, vanilla extract, and salt. Whisk well to prevent clumps.
- Let the mixture sit for 5-10 minutes, then whisk again thoroughly to break up any clumps and ensure seeds are evenly distributed.
- Pour the chia pudding mixture over the prepared crust (if using) or directly into the parchment-lined pan if making crustless bars. Spread evenly.
- Cover the pan and refrigerate for at least 4 hours, or preferably overnight, until the chia pudding is very firm and set.
- Once firm, lift the slab out using the parchment paper overhang. Sprinkle generously with toasted coconut flakes and extra lime zest.
- Cut into squares or bars using a sharp knife.
- Store leftovers covered in the refrigerator for up to 4-5 days.
Notes
- For a sweeter taste, adjust the amount of maple syrup or agave nectar.
- Feel free to substitute the nuts in the crust with your favorite nuts or seeds.
- These bars can be made crustless for a lighter option.
- Prep Time: 15 minutes
- Cook Time: 0 minutes
- Category: Dessert
- Method: No-Bake
- Cuisine: Vegan
Nutrition
- Serving Size: 1 bar
- Calories: 150
- Sugar: 6g
- Sodium: 50mg
- Fat: 10g
- Saturated Fat: 8g
- Unsaturated Fat: 2g
- Trans Fat: 0g
- Carbohydrates: 14g
- Fiber: 4g
- Protein: 3g
- Cholesterol: 0mg
Keywords: Chia Pudding, No-Bake Dessert, Coconut Lime Bars, Healthy Snack